The art of adding logos to physical products
![]() Eero’s latest generation of Wi-Fi products feature their logo embossed and then finished with hot foil stamping.
Eero’s latest generation of Wi-Fi products feature their logo embossed and then finished with hot foil stamping.
The right logo says everything without saying a word. It can help pique the interest of consumers, differentiate brands from competitors, facilitate brand recognition, influence investors’ decisions, and convey what a brand is all about.
But there’s an art and a science to adding a logo on to a physical product. It’s a nuanced process that balances aesthetics, functionality, and manufacturing considerations. The integration of logos must consider both design appeal and engineering feasibility — which is why close collaboration between industrial design and mechanical engineering is critical.
There are a variety of ways to add a logo to a physical product, and this week we’re exploring some of the most common methods used in hardware product development. If you want even more, be sure to check out the informal Design Puck, the CMF Database, and the informal MFG-DB, which can help you select the best method based on your specific variables.
Method #1: Pad printing
This indirect offset printing method is ideal for complex geometries, offering a cost-effective solution for branding plastic, metal, glass, and coated surfaces.
Pros:
✔ Versatile – Works on irregular, textured, and curved surfaces
✔ Efficient – Scalable for both small-batch and high-volume production
✔ Cost-effective – Lower setup costs compared to injection-mold engraving or laser marking
Cons:
⚠ Multicolor logos require multiple passes, and each pass has a chance of misaligning, not to mention slowing things down!
⚠ Best for small, detailed work, not large-scale designs.
⚠ If precision isn’t dialed in, you’ll get ink inconsistencies.

The Aloe Care Smart Hub showcases a nice use case of debossing and gloss texture for the center logo. The buttons around the perimeter are also pad printed!
Method #2: Digital printing
Digital printing is a fast, flexible, and high-resolution, ink-based method for applying logos directly onto a product’s surface. Unlike pad printing or silk screening, digital printing allows for full-color, photorealistic designs with variable data capabilities, making it ideal for custom, short-run, and high-detail applications.
Pros:
✔ Versatile – Works on irregular, textured, and curved surfaces
✔ Full-color, high-detail graphics – Ideal for photorealistic logos and intricate designs
✔ Flexible & cost-effective – No need for physical tooling or masks
Cons:
⚠ Some materials need pre-treatment for ink adhesion.
⚠ Cost per unit can be higher for large runs; screen or pad printing may be cheaper at scale.
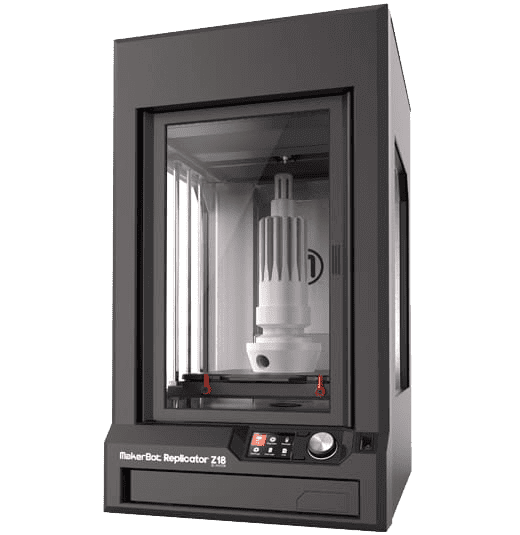
The Makerbot M logo was digitally printed on Dibond aluminum composite material. This was one of the first things I ever worked on, and it was pretty fun! It’s super durable and crisp.
Method #3: Labeling
Sometimes you need to add a logo without re-engineering your entire product. Labeling is fast, scalable, and can look premium if done right. But let’s be real: Labels can also be a disaster with peeling edges, faded prints, and misaligned placement. Bad labeling screams “cheap.” So make sure you spend some time deciding on: material selection, adhesion type, and application method.
Pros:
✔ Flexible & Cost-Effective – No need for physical tooling; enables you to test multiple designs
✔ Good for short production runs – Enables you to test different designs
✔ Versatile – Works on almost any surface
Cons:
⚠ Perceived value – Not the most premium option
⚠ Durability issues – Wear and tear shows over time
⚠ Application consistency – Misalignment, bubbling, peeling edges
Method #4: Embossing, debossing, texture breaks
Embossing and debossing are permanent, tool-based branding techniques that create raised or recessed logos on a product’s surface. These methods add texture, depth, and a premium aesthetic without requiring inks or adhesives, making them ideal for metal, plastic, leather, and paper-based products. They’re also great ways to minimally brand a product.
Debossed designs are sunken below the surface, while embossed designs are raised up above the surface. Optional finishing and durability enhancements include hot foil stamping for metallic accents, post-machining for crisper edges, or clear coat anodizing for wear resistance. It’s common to also add glossy textures to the embossed or debossed items to help make them pop.
Texture breaks are a subtle, tool-based branding method where a logo is distinguished from the surrounding surface by altering its texture rather than adding color, engraving, or embossing. This technique is ideal for plastic injection-molded, machined, or cast parts, providing durable, wear-resistant branding without extra processing steps.
Pros:
✔ Permanent & wear-resistant – No risk of ink fading or peeling
✔ Premium look & feel – Adds texture and enhances perceived product value
✔ No additional materials – Environmentally friendly, eliminating inks and adhesives
Cons:
⚠ Must be the same color as the housing unless you pad print on top of it (Risky!)
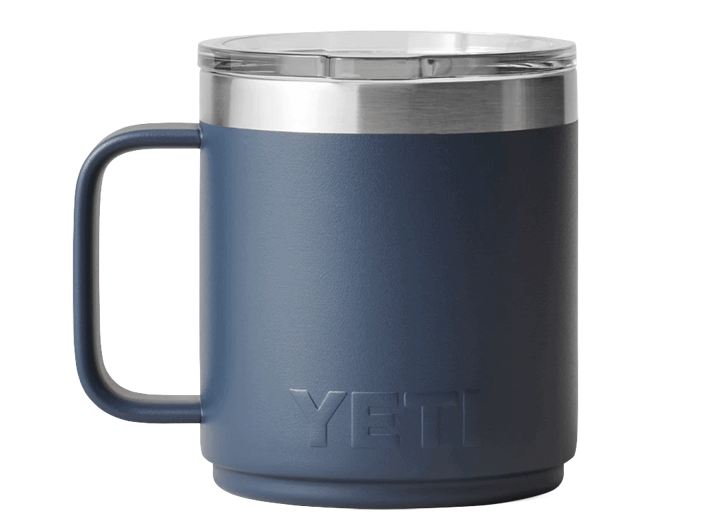
Yeti is another classic example of an embossed logo.
We hope this article sheds some light on all the fun things to consider when it comes to adding your brand/logo to a physical product. What are your favorite logo applications? We’d love to hear from you! If you need help with this process, drop us a line!
Informal is a freelance collective for the most talented independent professionals in hardware and hardtech. Whether you’re looking for a single contractor, a full-time employee, or an entire team of professionals to work on everything from product development to go-to-market, informal has the perfect collection of people for the job.